Friday, 15 March 2013

Super Cars Website

Introduction

In this blog I am going to explain what my website is going to be about and I am going to talk about each of the five web pages I will create and what they will contain. This blog will also contain a navigation diagram which will show how each web page will be connected.

Who's it for ?

This website I have designed is for super car fans that want to look at the latest cars out there and find the latest information about them. The target audience for the website is anyone from 10 years old on-wards as people from very young ages also loves super cars too.


Navigation Diagram of my Website 


Homepage ( Page 1) 


The homepage which will be called 'home' will contain the logo which is called 'super car' at the top and will then have a navigation bar as well as information on what the website is about.


About Us ( Page 2) 


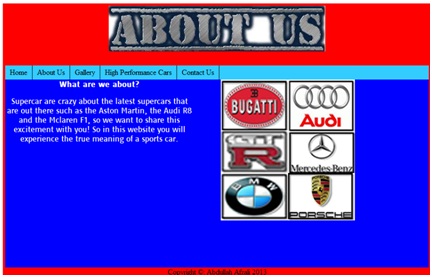
This page will be called 'About Us' and will introduce the website by talking about what we do and why we made the website. It will have a few images of different car logo's. 


Gallery (Page 3)

The 'Gallery' page contains the images of the best super cars so the users can see what is available on the market. 


High Performance Cars (Page 4)

The 'High Performance Cars' page will show the two most powerful and expensive cars out there and will give information about them for the users to read. 


Contact Us ( Page 5)
 
Finally the 'Contact Us' page is for anyone who wants to contact us for any questions they may have. It has contact details such as my number and email as well as having a map to show where we are located. 


Reference

Page designs - 10/03/2013 - www.Lumzy.com

Thursday, 14 March 2013

Tools and Techniques (Assignment 2)

Introduction

In this blog I am going to talk about the different tools and techniques used to produce my website and I am going to describe what each tool does.


HTML


HTML (Hyper Text Markup Language) is a language for describing web pages. HTML is a markup language. Markup languages are designed for the processing, definition and presentation of text. The language specifies code for formatting, both the layout and style, within a text file. A markup language is a set of markup tags. The tags describe document content. HTML documents contain HTML tags and plain text. HTML documents are also called web page. HTML language is relatively easy to learn. Many Web development programs (such as Komodo Edit) allow you to create Web pages using a graphical interface. These programs allow you to place objects and text on the page and the HTML code is written for you.

Example:

<!DOCTYPE html>
<html>
<body>

<h1>This is heading 1</h1>
<h2>This is heading 2</h2>
<h3>This is heading 3</h3>
<h4>This is heading 4</h4>
<h5>This is heading 5</h5>
<h6>This is heading 6</h6>

</body>
</html>


CSS
CSS (Cascading Style Sheets) allows a web developer to design a website in terms of the colour and design. CSS does not "create" anything all it does is decorates and align stuff on the web page. HTML (Hyper Text Mark-up Language) is responsible for the construction and the total output of a web page. The main job of CSS is to define what the HTML elements will look like; therefore CSS is built into all HTML tags. 

Example:

#container
{
 background:red;
float:left;
}

Komodo Edit
Komodo Edit is a free language editor that allows you to create web pages using many programming languages such as HTML5, CSS, Python, PHP, Javascript and many more. Komodo Edit is available on most operating systems such as Mac, Linux and Windows. Komodo Edit has many tools to help the user such as ready made templates for any language you are using that has the basic codes written out for you. When I was creating my website I used HTML5 and CSS and I used the HTML template and it had all the necessary code written out for me which made it easier for me. 

Lumzy (Wireframe Tool)
A wireframe is a design tool that is used in developing web pages. It is a tool that lets you present  the structure and content of your pages without actually making them. This is done by presenting each section of your make e.g. the header, footer and content in boxes and you would put dummy text and images where your actual content would go. This would then give you an idea of what your web page will look like. Wireframe is also used for designing other products such as cars, the car is made of lots of wires and a prototype is produced to show what it might look like. I made my website wireframe from Lumzy.com.

A Car Wireframe


Gliffy ( Graphics Program)
Glifffy is graphics tool I used to create my navigation diagram for my website. Gliffy allows you to create diagrams and flowcharts and provides a wide range of tools to use so you can make your diagram very easily. For example it has ready made templates such as a floor plan for a house or a diagram for a website. I used to shapes Gliffy had such as squares and triangles to make my navigation chart and connected them up with  lines. 

Lorem Ipsum/ Lorem Pixel
Lorem Ipsum is 'dummy text' that is used in website designs or any other document e.g. a poster. The text itself is Latin and was made by Cicero with the words altered. The main purpose of this text is to put it into what you are working on e.g. a website so you can see how the text would look and you can therefore change the font and colour. In the design stages you wouldn't need real text so you would just use Lorem Ipsum. In order to get it you go on the website (www.Loremipsum.com) and you can choose how many paragraphs of text you want. Lorem Pixel is the exact same thing but it has images instead, and you can use them instead of using your real images to change the size and contrast of it etc. The website for Lorem Pixel is www.lorempixel.com.

Reference


HTML Examples - 14/03/2013 - http://bit.ly/BK9pD

HTML  - 14/03/2013 - http://bit.ly/dl8XFm

CSS Introduction  - 14/03/2013 - http://bit.ly/hP4IL

 Wireframe - 14/03/2013 - http://bit.ly/YbtEBX


Thursday, 17 January 2013

P1- Explain how HTML files access CSS

INTRODUCTION

In this blog I am going to give a brief description of Inline, Internal and External and I will also give an example of each. 


...............................................................................................................................................

INLINE- With this technique the CSS code is written within the "<h1>" of the HTML code. This is an attribute of the HTML. With this written directly within the headings it overwrites the Internal and External techniques. This way is quick to change the colours and formats of text, however every time you want to change a colour format you have to write it out again in the <h1> headings.

Example: <h1 style="color:red;>


...............................................................................................................................................

INTERNAL
Means the code is stored in the web page inside the head tag. This is much better than inline because any CSS used within the page will inherit the formatting e.g. if the font colour is red everything else will change. A bad point about this if you have <h2> in a document you need repeat the code for every single page.
Example:
<Head>
           <Style>

            </style>
           

 </HEAD>

...............................................................................................................................................

EXTERNAL


This line of code below is in HTML and is put inside the head part of it which looks like this: <head>. The HTML code below links the CSS code from the “stylesheet” page to the HTML . This way the HTML code and CSS are on separate pages and they are linked together via the code below. So every time you add a new webpage all the format and colour etc will be kept the same. This technique is much better than Inline and Internal because the two codes are not mixed together meaning they are easier to find and read.

<link ref="stylesheet" href="style.css">

...............................................................................................................................................
REFERENCES

Types of CSS Styles -23/11/2012 - http://bit.ly/b9Audv

Wikipedia - 23/11/2012 - http://bit.ly/8Mqyj

M1- Assess different implementation styles of CSS

 Introduction

In this section I am going to assess different implementation styles for CSS. The different implementation styles in which I am going to talk about include: Internal Style Sheets, External Style sheets and Inline Style sheets.


 CSS (Cascading Style Sheets) allows a web developer to design a website in terms of the colour and design. CSS does not "create" anything all it does it decorates and align stuff on the web page. HTML (Hyper Text Mark-up Language) is responsible for the construction and the total output of a web page. As mentioned earlier there are three sections in HTML and I will go in more detail below. The main job of styles is to define what the HTML elements will look like; therefore CSS is built into all HTML tags. 


Which one to use?

This is a big question to ask, as you wouldn't know what CSS to use. Below I have given a description of each as well as the advantages and disadvantages to give a better understanding of Inline, Internal and External.  


INLINE CSS- With this technique the CSS code is written within the "<h1> < /h1>" tags of the HTML code. This is an attribute of the HTML. With this written directly within the headings it overwrites the Internal and External techniques. This way is quick to change the colours and formats of text, however every time you want to change a colour format you have to write it out again in the <h1> headings. Inline loses many of its advantages of style sheets because it mixes with the content with the presentation. 


Example: This example shows how to change the colour and right margin of a paragraph.


<p style="color: blue; margin- right: 25px;"> My name is Abdullah


This would show the paragraph as:


" My name is Abdullah"


Advantages of Inline


1. With Inline you don't need to create an external document (as you would if you were using external sty sheet). As well as this you don't need to edit a new element in the head of your document (as you would with an internal style sheet). Inline are therefore very easy to add and can save a lot of time. 


2. Testing- Web designers use inline style sheet when they are first working on a new project. This is because it is easier to scroll up in the source instead of changing the source file. More importantly inline can be used to debug pages if there is an error and it is hard to fix. 


3. Loads Faster- This is a major benefit with Inline CSS as it has lower HTTP requests. This means that Internal CSS websites load much faster than External CSS websites.   


Disadvantages of Inline


1. Must be used on every Element-The Inline style must be used for every element you want it on so it can be much more time consuming if you are creating a large site. For example if you wanted all your headings to have a font of "Ariel" you would have to add an inline < p> < /p> tag  in your documents. This will also add download time for the website user when they are opening the site. 


2. Over writing External and Internal- Because Inline is the most specific in the cascade It means you could override your other style sheets such as external and internal even if you didn't intend to. This can therefore cause problems for the web developer. 


INTERNAL CSS
 An Internal style sheet means the code is stored in the HTML section of the web page inside the head tag. This is much better than inline because any CSS used within the page will inherit the formatting e.g. if the font colour is red everything else will change. A bad point about this is if you have <h2> in a document you need repeat the code for every single page. With this style sheet it means that each HTML file the CSS code needed in order to style the page. This means that if you want to make a change to one page, it would have to be done to them all.  


Example:

<Head>

         hr {color: red;

         p {margin-left:20px;}


            </style>


 </HEAD>


Advantages of Internal 


1. Same style on every element- This means that Internal styles don't need to be applied to every element. If you want all your headings or paragraphs to have the family font "Ariel" you would have to add an Inline style <p> tag within your internal style document. This can benefit you if you want to keep all the fonts the same as you just need to do it once.


2. Testing- Internal style sheets are a very useful tool for web developers as they allow you to test your styles in the context of your entire site without breaking any pages apart from the one you are testing. 

Disadvantages of Internal 


1. Slow Loading- One of the biggest disadvantages of Internal is that the web pages load very slowly. This is because there are less HTTP requests and are slower than External and Inline. If you were making a website I would not recommend Internal as you site should load within 15 seconds to stop people from diverting from your site. 


2. File Size- When the web developers are working, the page size increases. Although it is helpful for the developers when working offline, it can cause the site to load slowly when they are online.  


EXTERNAL


An external Style sheet is when the code (which is shown below) is in HTML and is put inside the head part of it which looks like this: <head>. The HTML code below links the CSS code from the “stylesheet” page to the HTML. This way the HTML code and CSS are on separate pages and they are linked together via the code below. So every time you add a new webpage all the format and colour etc. will be kept the same. This technique is much better than Inline and Internal because the two codes are not mixed together meaning they are easier to find and read.
<link ref="stylesheet" href="style.css">

An external style sheet can be written in any editor program. The file should not contain HTML tags and should be saved with a .CSS extension. 

For example: 

hr {color:blue;}
p {margin-right:25px;}
body (background-image:url("image.gif");}

Advantages of External Style Sheets

1. File size is reduced- Because the styling text is within a different document it means that the file sizes of the pages will be reduced quite considerably. As well as this the content to- code ratio is much greater, than if it was just simple HTML pages. This means the structure and content is much easier to read by the developers. 

2. Increasing Traffic to your site- CSS lets you to display your website according to the HTML standards. This can be done without changing any looks or designs on your site itself. Google gives little value to well organised web pages. This means that more traffic can be directed towards your site.

3. Because the style is separated from the HTML page and is put within a CSS style sheet it means that there is less code within the page but more importantly it makes it more easy to work with and less confusing as the HTML is separated with the style sheet.


Disadvantages of External Style Sheets

1. If you have a small website it could be more complicated to use external style sheets because they can increase quite fast and if you have deleted web pages it can be confusing as you wouldn't know which style sheet is needed.

Conclusion
As you can see all Inline, Internal and External have their advantages and disadvantages. The right one to choose really depends on what type of website you want to make. For example if your website is only a page with not much design and colour it would be best to use Internal and enter the CSS within the head of the HTML. However if your site has many pages and is quite complicated, I would recommend you use the External Style sheet as it will make is simple because the CSS code will be separate from the HTML, and if there is a lot of code it is better to separate it in order to not get confused. 

...............................................................................................................................................

Reference 

Inline vs Internal vs External CSS-17/01/2013 -http://bit.ly/V9U346

Basic Tips - 17/01/2013 - http://bit.ly/XhhzqN

 Expression Web Tortorial - 17/01/2013 - http://bit.ly/W927Nt

W3 Schools - 17/01/2013http://bit.ly/67RTT


Wednesday, 16 January 2013

P2- Explain the features of the box model for CSS

Introduction 
 I am going to briefly explain the box model for CSS and also explain how they are used. There will also be illustrations and diagrams to help explain the box model. 


Every single element on a web page is a box. The word " box model" used when talking about the design and layout of a website. The CSS box model is a box that wraps around the HTML elements. This contains the following: Margins, Borders, Padding and the content them self.

This is a diagram of the Box Model


Margin 
The margin clears the area outside the border (element). As this is transparent it means it has no background colour ( its basically the areas with nothing on it). The position of the margin (top, bottom, left, right) can be changed by using CSS to specifically change the different sides for the margin.

For Example: 

margin-top:100px;
margin-bottom:100px;
margin-right:50px;
margin-left:50px;

Border

The border property lets you change the style  e.g. dashed border, the colour as well as the thickness of the borders on your website. Some of the key words for the border style include: Dotted- this produces a dotted border, Dashed- this produces a dashed border, Solid- this produces a sold border and Double- this produces two borders together.

For Example: 

h1
{
border-style:dashed;
border-width:50px;

}

Padding

The padding clears the area inside the border. The main difference between padding and margin is that padding is affected by the background colour of the element, whereas the margin will always be transparent. All sides of the padding can be changed independently. 

For example:

padding-top:25px;
padding-bottom:50px;
padding-left:30px
padding-right:30px

An example of all the elements of the box model used together:

box{
       border-style:dashed;
       padding-top:25px;
       margin:30px;
       width:100px;
       }

Content
The content is the centre of the box model. This is where all the text and images are stored on the website. It is basically the main section with all the information your website would need.

...............................................................................................................................................

Reference 

1. Box Model - 17/01/2013 - http://www.w3schools.com/

2. CSS Box Model - 17/01/2013 - http://bit.ly/4goNJE

3. Yahoo Answers - 17/01/2013 - http://yhoo.it/V6an2g